Posts

Showing posts with the label Top Tip Fridays

Top Tip Friday: How to get the "Doily Look" on fondant toppers.

Image
Scalloped edges punched out to make a pretty doily effect. I know it's out of season now, but the pretty doily effect on the edges of these scalloped fondant toppers, would totally look fantastic for any occasion, any time of year! It's really pretty simple and all you need is a scalloped edge circle cutter (I am pretty sure they have lovely oval and heart shaped ones now too) Cut out your shapes then get  a small circle piping tip and cut /punch out little circles along the scallop line. I find a good dusting of corn flour underneath helps prevent sticking as you go around the circle. Team it with a bright coloured next size up, plain circle underneath to really highlight the pretty punched out edge or leave them plain - either way they will look great. A simple yet awesome technique that will give your next edible toppers that extra wow factor! And they say a picture tells a thousand words so check it out!!  Cut and punch ...

How to Level and Torte a Cake Without Special Tools!

Image
A few weeks back on Top Tip Friday I talked about how cold or partially frozen cakes are so much easier to cut with an ordinary bread knife. I don't own an Agbay, (I cannot justify the price since I do not bake for profit) so I make do with every day tools in the home bakers kitchen!  Now I did promise to give you more! And today I am finally coming through! There's a little trick I learnt off Wilton on how to level your cake. You know, sometimes the unavoidable happens and  Eeeek!  You have this dome shaped cake!  Now check this out! The first part of the video is what I am talking about! It's genius! Just use your cake pan as a guide to level it! If you don't want to watch the video here's a photo of how I level off the top of my cakes. It Really Does Work! So that's a fantastic tip right?  But what about torting? I said I don't use any special tools right? And that is correct. Ok so what you do need is some kit...

Top Tip Friday #20 Torting & Levelling Cake Part1

Image
This week's Top Tip comes directly from a conversation I was having with my friend Melanie from One Tier At A Time today. Every one has their preferred methods of torting (slicing the middle of the cake) and leveling (trimming the top) and she'd very much like Santa to give her an Agbay! (Apparently a Rolls Royce in the cake leveler  brand range!) But hey I'm not a pro, but sure willing to give it a go - which also means as a hobbyist I could never afford an Agbay, and well I don't actually make enough cakes in a year to justify one.  So Melanie says, "But I like my cakes to be level!"  And I cheekily send her that photo pictured above "Oh I don't need an Agbay!" She agreed,  yes I am awesome. And no I don't need an Agbay. Ha ha ha! Well that is of course until the time comes that I am making cakes on a weekly basis, then maybe I might like to spoil my self! But for now I like to do it " Home Baker"  style!  Which brings ...

Top Tip Friday #19 : Keep Fluff & Lint out of your Fondant.

Image
Don't you hate it when you spend all that time rolling out fondant or modelling something awesome only to realise there's bits of fluff or lint stuck in it. Especially with white! Oh my gosh white fondant is totally unforgiving - everything,  and I mean EVERYTHING shows up! The best way to avoid this fondant fluffination (as I like to call it,) occurring in your fondant and gumpaste is to clean up the lint on your hands and work surface first.  Even after washing your hands it's inevitable you will still have teeny bits of fluff, lurking around in stealth mode, just waiting to make it's appearance to dull your creations. See, when you dry your hands on a towel (cloth or paper) those tiny fluffy bits are jumping straight on to your hand. Solution? To get your hands and work surfaces clear of this annoying fluff and lint, get a small ball of fondant and turn it into "The Fluffinator!"  Um yes I just made that word up, sounds ...

Top Tip Friday #18: Best Cutting Tools for Fondant and Gumpaste

Image
While there are loads of ready made cutters available, one does not simply have the room to store them all (or the cash) and there really isn't a pre made cutter for every kind of creation, especially custom designs. At some stage you are going to need to free hand it. Most importantly for all your projects, from cutting custom sized bows to 2D Logos and everything else between, a good sharp blade is a must!  Sharp being the most important key here, otherwise your fondant will drag and pull and the result may not be as neat as you were hoping (and that's not a great feeling.) Also, there isn't just one knife that does all the jobs! But never fear, my three most favourite cutting tools covers most of them, and more importantly, can be disguised as being for other projects around the house, your family will be none the wiser and won't get on your back for buying too many cake decorating tools!!  Yes it's an ingenious  plan!  [insert evil laugh] "Mwahaha...

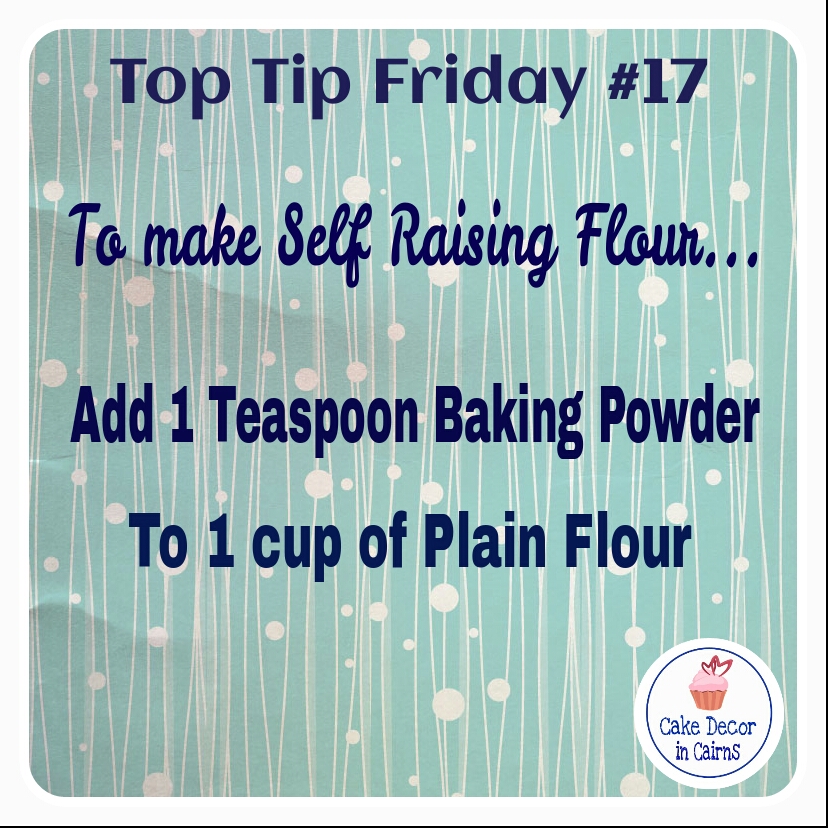
Top Tip Friday #17 : How to Make Self Raising Flour!

Image
I have had a super busy week! I can't say it was busier than normal though, just the normal crazy busy that comes with being a mum! But today was extra busy being a workshop day! Phew I am exhausted!  How's your week been?  I am about to enjoy a hot chocolate and watch a dvd, but before I go here's this week's Top Tip Friday!  Lots of recipes floating around call for self raising flour but what do you do when you only have plain flour? The general rule is to add one teaspoon of baking powder to every cup of plain flour. Mix and sift together...  Voilà!  Self Raising Flour! Ohhhhhh and if you have any questions about Self Raising Flour and other recipes that call for a higher ratio of baking powder per cup; I found two fantastic articles that help explain everything perfectly!  Gourmet Traveller http://www.gourmettraveller.com.au/recipes/how-to/2009/12/self-raising-flour-vs-regular-flour-with-raising-agents/ Serious Eats http://ww...

Top Tip Friday #16 DIY Large Flower Formers

Image
Check it out! I picked up these Willow brand dome shaped patty cake pan trays for $2.75 each at my local Big W store today! Just my awesome luck they had 50% off the entire Willow range!  Best thing about them is because they have that perfectly rounded domed base they double up as the best large flower former's money can buy!  A two for one saving here -  "It's a Patty Cake Pan!" "No it's a Fondant Former!" "No it's a patty Cake Pan!" "Hang on a Minute!!" "It's BOTH!!!" Oh and my favourite thing about using these patty pans as formers for my fondant creations? They are non-stick and hygienic!  Do you have these pans at home? Share ♡ Inspire ♡ Motivate :: Home Bakers Doing it For Themselves! 

Top Tip Friday #15 Shaping Fondant Pieces on sides of Cakes

Image
Trying to come up with a title for today's cake decorating tip proved harder than I had expected!  I don't know how else to explain what I mean. Drying fondant /gumpaste pieces in a rounded cake shape  that are going to go on the side of your cake seems like an awfully long title!  So hopefully the visual picture tells the one thousand words I am trying to convey across to you!  Okay, I think I am due for a second cup of coffee! I'm not thinking as quickly as usual and I almost forgot to put up today's tip! Well my excuse  being a public holiday for the local Cairns Show day I woke up thinking it was Saturday! I like to make detailed fondant accents to the sides of my cakes. Hmmm, the word accents sounds like just some shapes, so  perhaps I should call them "Siders" since they are technically not toppers!    The issue with being more detailed is that you cannot just cut them out quickly and stick them to the side of the cake - gravity wil...

Top Tip Friday #14 Easy Lift Cake Boards

Image
Easy Lift Cake Boards? What's that all about you ask? Well you know when you decorate a cake. It's looking all pretty and you try to lift it up and oops you put dints in your finished board or worse bump your cake?  What about when you place it on a lipped cake stand and you want to lift it up without damaging said board or cake? "Yes!" Well I find the easiest solution is to get down to your local cheap shop (here in Cairns I use Overflow and The Reject Shop) and grab a $3 packet of self adhesive felt pads.  You know the ones that traditionally are for under furniture to stop your floors from getting scratched. You can get them in circles or mixed shapes - it really doesn't matter. It's quite simple really, but helps me every time!  Just peel and stick in an even space ensuring your board sits level. The felt pads will raise the height of your board slightly and give you just enough space to lift your board...

Top Tip Friday #13 Keeping That Hot Knife Hotter For Longer!

Image
When you're needing to keep your knife hot for smoothing butter cream or ganache use a thermos to keep your boiling water hotter for longer.  It's the perfect height for your knives and saves time having to re boil water. Share ♡ Inspire ♡ Motivate : Home Bakers Doing it For Themselves!

Top Tip Friday #12 Preventing Cake Slips.

Image
This weeks Top Tip Friday comes from the archives deep  with in my memory bank of Cake Slip Horror stories.. I am a bit embarrassed to admit, it but it probably took me 3 times before I actually realised that there was a simple solution to each one of my woes. Imagine this... My First Ever Fondant Roses I spent a week on my best friend's birthday cake. I painstakingly created my first fondant roses - Wow! I was proud of myself! After watching YouTube after Youtube I think I actually produced something that looked like a rose! What do you think? (Please just humor me and just say "YES! Stunning roses well done!") I baked two of the most yummiest cakes, using Wilton's Yellow Cake Recipe  and I  stacked  the 2 tiers with perfection (well I believed it was perfect so that's all that matters! Right?) I was really enjoying baking this cake, with so much cakey love. You know, the kind of love that goes into making a cake special. You can't bu...

Top Tip Friday #11 : My Buttercream Tastes Like Garlic!

Image
You  found the perfect  Buttercream Recipe . You lovingly decorated your cupcakes within minutes of your guests arriving. You placed them on the serving tray and oops there is one  too many, so you thought you better not waste it and took a big bite....  Ewwww! Tastes Like Garlic!  And there you have it my friends, fridge odours and smells from things like Garlic and last nights Supreme Pizza have transferred into your butter cream and now it tastes like Aioli! The simple solution to this, is to store your Butters, Copha (Shortening) and Cooking Margarines in sealed containers that keep odours and smells out. Personally I prefer Tupperware freezer containers, but of course you can use what ever product works for  you. It's much easier to contain your butter blocks than trying to lock up the whole fridge. Most frost free fridges circulate air through the fridge and freeze...

Top Tip Friday #10 : Drying Fondant Cutting Mats

Image
Do you find it a challenge to get all your cutting mats to quickly dry without spreading them all over the kitchen? I seem to always have at least 4 or 5 mats on top of other tools and equipment to air dry, which makes no room on my dish rack. Besides my largest mat is too wide to fit! Are you like me? When I have a fondant / gumpaste project happening, I find I use several mats at a time, especially when I am using different colours and need to avoid pigment transfer. (Am I the only one who does this?) Then there are after workshop days where I have 10 mats at a time to wash, sanitize and dry!  To solve my dilemma I picked up a file divider from the stationery section at my local Big W store! It works a treat and fits perfectly on my sink and bench top. I chose a file divider as it's light, as 8 slots, the coated wire makes it thin enough to drape not cutting silicone mats on there also.  But wait!  There's More! I'm not one for buying novelty items,  s...

Top Tip Friday #9 : Oven Temperature

Image
A Basic Oven Thermometer.  The right baking temperature is very important especially when baking cakes and pavlovas. Even 5 degrees can play havoc! Too hot and your cake rises too high in the centre or burns on the outside, too low and you may underestimate the cooking time and take out too soon. Since following this simple tip, my cakes come out even everytime! Evenly Baked Cakes Every time.  Don't rely on your oven temperature dial! One of the best things to buy is an oven thermometer so you know exactly how hot your oven is, no matter what your oven says. If the temperature is way off, adjust your oven dial or call in an oven repair man to find out what's wrong.   Share ♡  Inspire  ♡  Motivate :: Home Bakers Doing it for Themselves.

Top Tip Friday #8 : Soften Butter Faster

Image
You're all keen as mustard to bake a cake but the recipe calls for softened butter and eeek! Your butter is hard, or in the case of Copha - rock hard! If you're anything like me,  you're a little impatient and want things to happen now rather than later. So what's an impatient Baker to do? Try this method, next time you're in a hurry. (It might seem like a basic idea but you'd be surprised just how many people don't think of it, or simply forget at the time.) Top Tip Friday #8 To bring butter and Copha to room temperature quickly,  dice the block into small cubes on a plate, with a smaller size the Butter and Copha can soften much faster than in its original block. Share ♡  Inspire  ♡  Motivate :: Home Bakers Doing it for Themselves.

Top Tip Friday #7 Evenly Baked Cupcakes

Image
A quick and simple way to ensure your cupcakes rise at the same height (or as best chance as possible) is to place the same amount of  cake batter into each cupcake case / baking cup. And I find the easiest way to do this quickly is to whip out a 1/4 measuring cup to simply measure and pour. It works everytime! ♡ Share ♡  Inspire  ♡  Motivate :: Home Bakers Doing it for Themselves.

Top Tip Friday #6 : Fixing Squashed Cupcake Cases / Patty Pans

Image
Don't you hate it when you squash your cupcake cases and baking cups? Usually you have to throw them out and buy new ones! Stop!   Before you throw money into the rubbish bin, try this quick tip! It works for me! Get a tall glass and push the stack into the glass until it's sitting snug. Use your finger to smooth around the inside circle. After an hour or over night  take them out, and your cases are ready to be used again!! *Extra Tip: put some cling wrap under the cases before placing in the cup so you can easily lift them out when you're done. 

Top Tip Friday #5: How Old is that Egg?

Image
When I make Pavlova I need to use the freshest egg whites possible. But because  I have free range chickens in my backyard  I am not always 100% sure just how old those eggs are! And when I buy store bought eggs I'm not always convinced on what the best before date says. So the age old water test always comes through for me... How to tell how old eggs are: A fresh egg sinks in fresh* water,  while a stale egg will float to the top.  That’s because pockets in the shell become larger as it ages and its yolk shrinks. (The inbetween ones are still ok for baking but the freshest ones are a must for Pavlovas and Meringues) *Emphasis on fresh water. All eggs will float to some extent in salty water. The saltier the water the higher the buoyancy. Share ♡  Inspire  ♡  Motivate :: Home Bakers Doing it for Themselves.